

In the 60’s, the Hawk corporation released a conceptual model of the Manned Orbiting Laboratory (MOL). It was based on an Atlas booster and had a clear nose section and a detailed (for the time) interior.
My favorite feature of this model were the two lifting body re-entry vehicles.
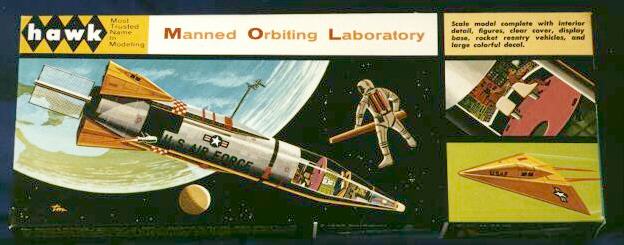
Sven Knudsen has scans of the Hawk box artwork that he sent me, so I was able to see the design clearly. Doug Devers (a buddy from my old German Projects mailing list) got his hands on this now relatively rare model. He sent me scans of the instruction sheet and of the “Dorito” shaped re-entry vehicle.
Construction
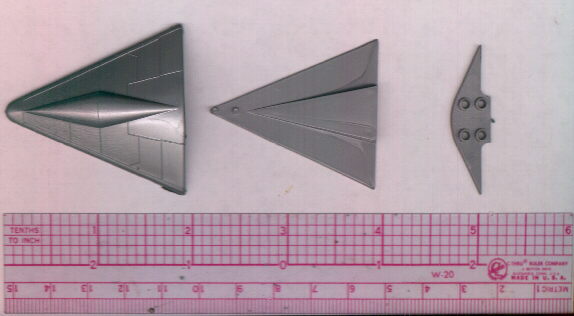
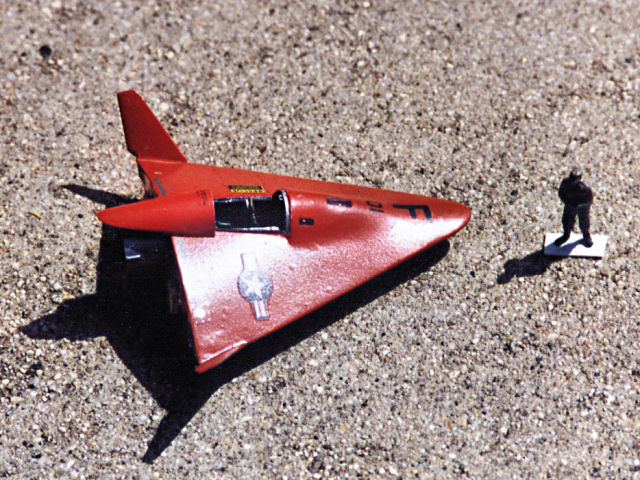
The “Dorito” pictures were just what I needed to scratch build a model of an experimental re-entry vehicle, circa 1968. I called it the “Re-entry Vehicle, Experimental” or RV-X. I imagined this as the prototype of a general purpose spacecraft that could be used to ferry two astronauts into orbit, as an emergency re-entry vehicle or as a quick response manned military recon craft. It could be used to photograph hot spots from low Earth orbit, or inspect (and possibly disable) the satellites of potential enemies. The craft would be capable of supporting its two man crew for up to 2 days in orbit, and has a large engine that can be used to change orbit or for re-entry.
Using Doug’s scan, I made some cross section drawings on my computer and scaled them up to 1/72 scale (assuming that the original was in 1/96 scale…more on this later).
The drawings were then used to cut the main sections out of thin styrene sheet. I glued all the sections together, and cut out the center part to take the cockpit tub from an old Hasegawa 1/72 T-33.
I glued some surfboard foam at the nose of the vehicle, and sanded it to shape. The cross sections were covered with 0.005″ sheet styrene which was glued in place, then trimmed to the contour of the bottom section. This produced a smooth, seamless skin. Unfortunately, the plastic was too thin, so I re-skinned the model with another layer of 0.005″ styrene. Next, I cut out the cockpit opening, and inserted the cockpit tub.
I made a form for the canopy out of surfboard foam and used it to make vacuformed copies out of 0.01″ styrene. I cut and trimmed the resulting canopies to fit the model.
I added some photo-etched instrument panels from a Me-262B PE set and two highly modified resin ejection seats to complete the cockpit. As I was building the RV-X, I also entered the design into the Plane Maker program that is part of X-Plane.
I tried flying the RV-X in X-Plane, but discovered that the original design had a tendency to tumble and roll uncontrollably at the slightest provocation. I added some winglets to the design, and the RV-X became relatively easy to fly – as a glider.
For the model, I made the winglets from the vertical tail surfaces of a DML 1/144 scale Mig-29. I also added control jets, for in-orbit positioning. I didn’t want to mar the smooth upper surface of the RV-X, so I added the control jets to the bottom of the craft. If you think about it, this should be enough to orient the craft into any position while in orbit.
The large rocket engine in the rear is from a Glencoe Lunar Lander. The booster adapter shroud around it is the clear cap from a Testor’s airbrush tip container.
The control jets and various boxes on the rear panel of the RV-X came from a series of “science fiction” kits that were on sale at Squadron a few years ago. They were from a Czech company called Andromeda and were supposed to represent various spacecraft and robot designs. In fact, they were some of the sprues from a 1/150 scale model of a Russian Tarantula missile boat. In any case, the kits make for a really handy source of parts.
The landing skid came from the Testors re-issue of the old Hawk 1/48 scale Me-163.
Painting
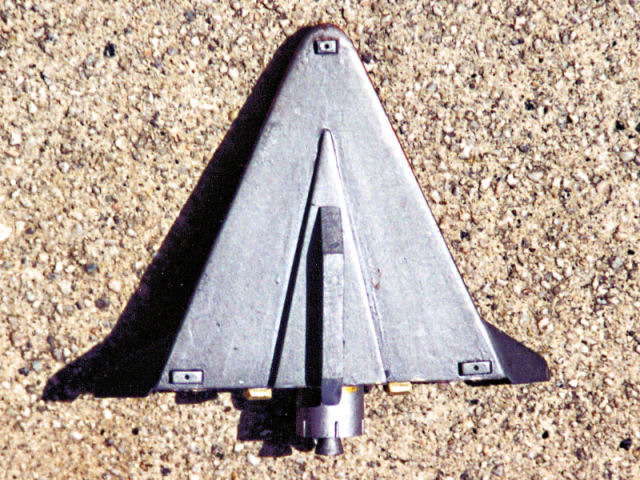
I painted the whole model with Gunze Sangyo’s Mr. Surfacer 1000, to find open seams and other defects that needed repair. This was followed by a coat of Testors MM Titanium metalizer on the lower surface.
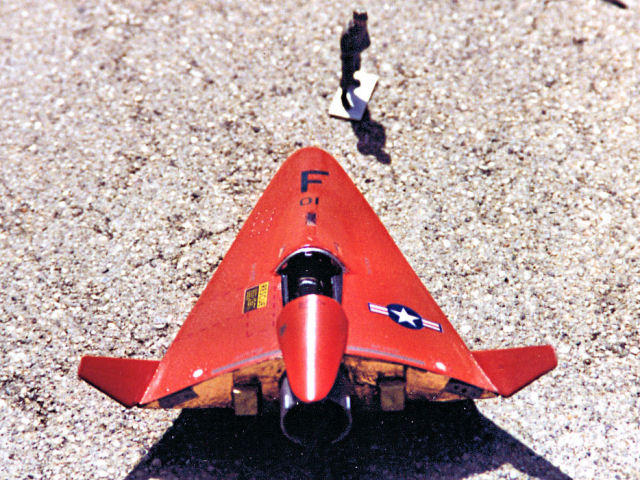
The upper surface was painted with Testors Acryl International Orange. This was tough going, mainly because I dribbled some denatured alcohol onto the freshly painted model (after some of the decals had been applied!) and was forced to redo a large section near the nose.
Decals
The national insignia and rescue data block came from an old decal sheet for an F-104 fighter. Other markings came from the Testors 1/72 “F-19” kit. I used my Alps printer to make the red walkways and silver (they look gray in the pictures) access port decals.
Finally…
Overall, this was an instructive little project. There are a few obvious errors in the model, mostly having to do with alignment of the parts and the paint job. The cockpit is slightly skewed to one side, and the canopy was a real bear to fit. After finishing the model, I discovered that Sven Knudsen had a picture of the boxtop on his site. Two problems became evident – first, the original kit was closer to 1/100 scale, not 1/96. This may seem like a small difference, but it would make the cockpit slightly less cramped in 1/72 scale. The other problem is that the boxtop design for the two lifting bodies is different from the plastic included in the kit! The boxtop shows the cockpit further forward, with more angular sides.
Well, I’ll get to correct some of these mistakes next time, since I plan to remake this model. The original – shown in these pictures – was bought by someone who loved this lifting body design!
Updated August 5, 2020