After the end of W.W.II, the French returned to their colonies in Indochina and encountered… some hostility from the locals. Even though it was soon after the War, the French had difficulty obtaining aircraft and other military equipment so they had to make do with captured Japanese aircraft and some Spitfires. One of the Japanese fighters that the French were most interested in was the Ki-43 Hayabusa “Oscar”. After some effort, they were able to get a handful of less than pristine examples of the Ki-43-II and Ki-43-III operational. Most of these planes were eventually lost in landing accidents, and were quickly replaced with Spitfires.
There are only a few grainy B&W pictures of the French Ki-43s, and most are of the Ki-43-III. When I made this model there was only one kit of the Ki-43-III in 1/72 scale, made by Gartex. It used the excellent Hasegawa 1/72 scale Ki-43-II as the base kit, and adds a new resin fuselage with the Ki-43-III exhaust. The Gartex kit is quite expensive, so I went with the base kit, the much cheaper Hasegawa Ki-43-II.
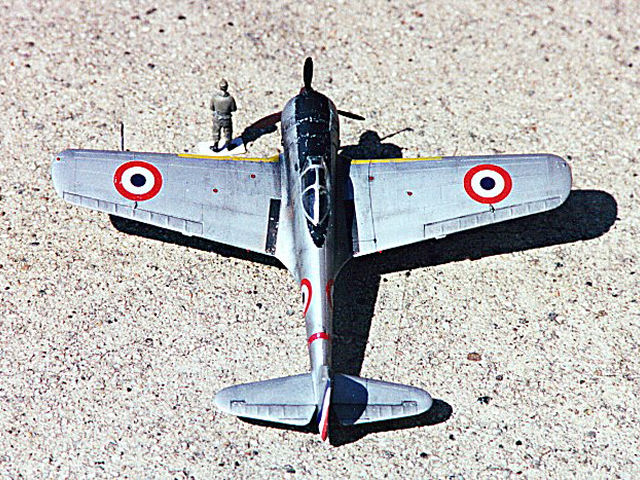
I started by building the cockpit. I added a simple lap belt to the seat, opened up the seat back holes and added generic resin cockpit sidewalls, made by Reheat. I also cut out the landing light on the port wing leading edge (Hasegawa had it on the starboard wing) and made a new vacuformed canopy. The kit required very little putty and fit quite well.
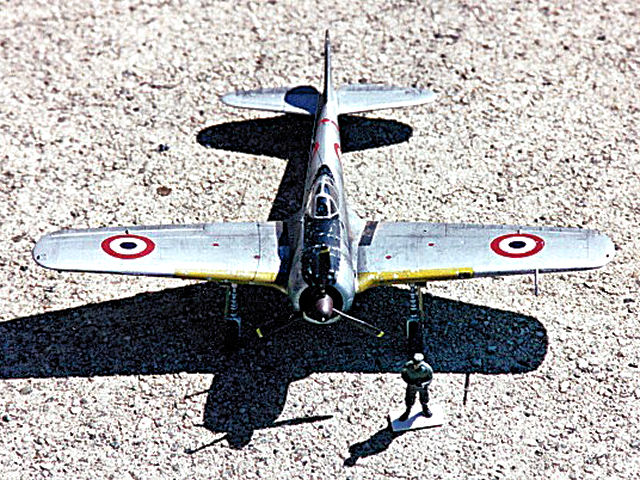
After stuffing modeling clay into the cockpit and cowl opening, I painted the model with Testors Metalizer non-buffing aluminum, then masked off and painted the yellow ID bands on the leading edge and the black antiglare panels around the cockpit and upper cowl. I hand painted the fabric covered control surfaces with the same Metalizer color I used on the rest of the plane. Even though it’s the same color, hand brushing adds some texture to the control surfaces.
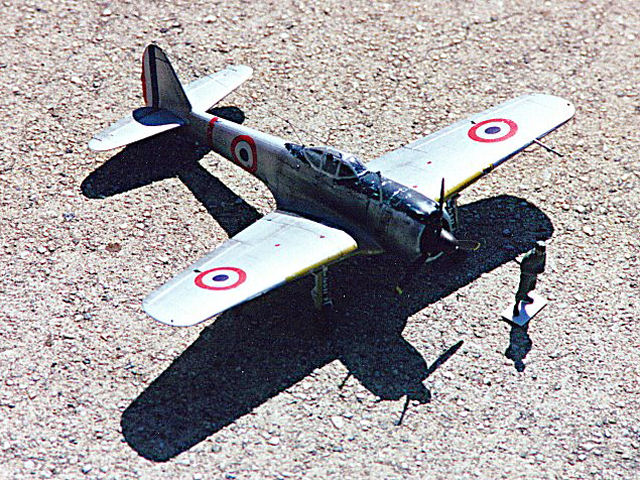
Now I had a factory fresh Hayabusa. Looking at the pictures of the French planes, it was obvious that I would have to do a lot of weathering. I used black and brown pastels and a cotton swab to force grime into and around panel lines and on the control surfaces. I then chipped away at the painted cowl and leading edge to reveal the aluminum paint underneath. Even after all this aggressive weathering, the plane doesn’t look quite as filthy and beat up as the original.
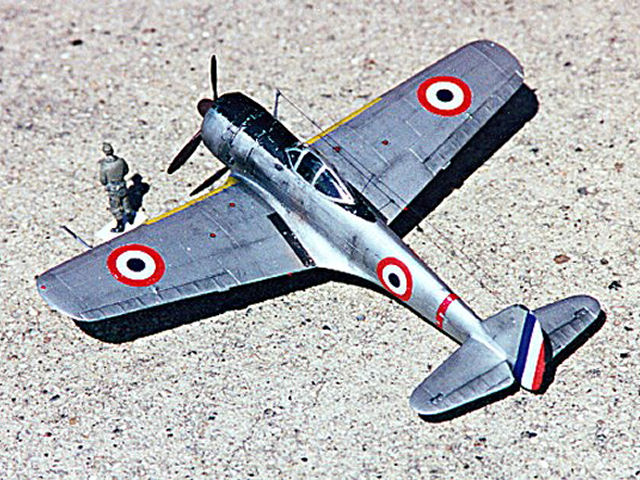
I made the French roundels and the rudder flash in Canvas and printed them with my Alps MD -1300 printer, using fresh decal paper from Tango Papa decals. This was the first set of decals I’d ever made, and they came out quite well, except for the blue which is far too dark. I used a decal setting solution, but I probably didn’t need it; the decals were thin and strong, and settled nicely onto the kit. The rudder decals were printed as a rectangle, slightly larger than the kit’s rudder. I applied the decals to both sides of the rudder, let them dry, and carefully trimmed them to match the outline of the rudder. I then painted the few spots along the edge that were not covered by decal.
I was tempted to use the kit’s Hiromanus under the French roundels (just like the French did on the real planes) but a test on a scrap piece of plastic didn’t look right. The other kit decals (fuselage band, wing walk, prop warning and stenciling) was added, and the final weathering was done. I sealed everything up with a mix of Future and Testors Acryl flat clear, and finally added the canopy and radio wires.
I’d like to thank J.-P. Maire of France, for sending me a copy of the article listed below.
Reference article:
Les avions japonais aux couleurs françaises par Jean-Claude Soumille
Updated August 5, 2020